Friday, October 16, 2015

Exterior Lighting- Day 2

Day 2 of this tutorial went much more smoothly, with minimal frustration. 

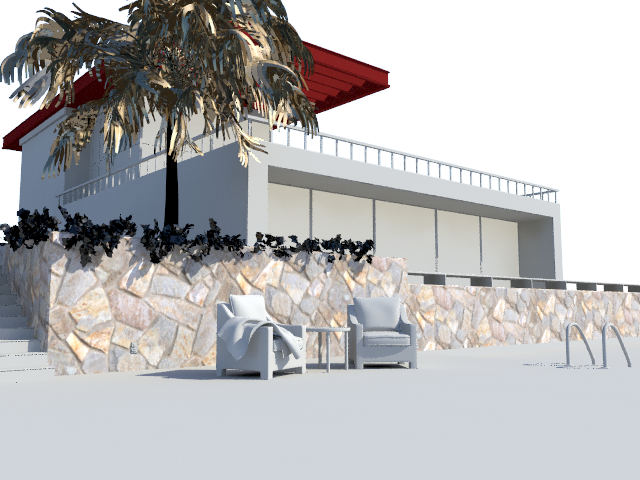
The first thing I did was add a texture and a bump map to the patio. I also learned how to use a grid texture to create the tiles around the pool. For the pool water, I colored the polygons underneath the surface of the pool, and made the polygon on the surface transparent. I applied an ocean texture to the surface and tweaked the waves so that it would look more realistic. 


The other thing I did was apply most of the other textures in the scene. I fixed the ivy leaves hanging over the wall and leaves on the taller tree. I had to reassign the textures on the chairs and the house, which was more tedious than it was difficult. 

Exterior Lighting- Day 1

Now that I'm caught up, I started working on a tutorial over texturing and how to realistically light an exterior scene. 

This is the initial render of the scene, with no textures and only a single light source; the sun. It took me a while to figure out how to drop in a sunlight source, because Maya 2016 has changed the location of most of the render settings. 


After making slight changes to the sun and the gamma-correcting the camera lens, the scene is already brighter. 


The last thing I did today was apply a texture and a bump map to the stone wall, and a simple colored material to the roof. I definitely struggled with this the most because I haven't used the Hypershade in over a year and most of the layout is different. I finally figured out the linear workflow of texturing, and how to resize an image/bump map texture to make the stone wall look more realistic. I also learned that basically anytime I apply a texture to something I will need to gamma correct it because most textures will render out looking lighter than they actually are.  


Tuesday, October 13, 2015

Different Types of Camera Shots

Aerial shot: an exterior shot filmed from the air
Arc shot: subject is circled by the camera
Bridging shot: denotes a shift in time or place
Close up: keeps only the face in frame
Medium shot: shows a bit more than a close-up
Long shot: depicts an entire character or object from head to foot
Cowboy shot: shot framed from mid-thigh up
Deep focus: keeps the foreground, middle ground, and background all in sharp focus
Dolly zoom: camera tracks forward while simultaneously zooming out
Dutch tilt: camera is tilted on its side
Establishing shot: clearly shows the locale the action is set in
Handheld shot: camera operator holds the camera to create a jerky motion
Low angle shot: looks up at the character
High angle shot: looks down at the character
Locked-down shot: camera is fixed in one position while the action continues off-screen
Library shot: pre-existing shot of a location
Matte shot: incorporates foreground action with a background painted onto glass
Money shot: a shot that is expensive to shoot but deemed worth it for its potential to wow 
Over-the-shoulder shot: camera is positioned behind a subject's shoulder
Pan: camera moves continuously from from one side of the scene to another
POV shot: depicts the point of view of the character
Sequence shot: covers a scene in its entirety in one continuous sweep
Steadicam shot: hydraulically balanced camera that gives a fluid motion
Tilt: camera moves continuously up to down or down to up
Top shot: birds-eye view
Tracking shot: follows a subject from in front, behind, or alongside
Two shot: depicts two people in the frame
Whip pan: same as a pan but is ridiculously fast
Zoom: distance between camera and subject changes without physically moving the camera
Crane shot: camera is placed on a crane/jib and moved up or down

Walk Cycle

I finally did the walk cycle. Finally. After all these days. Creating the actual walk for the bear was not difficult at all, because a teddy bear doesn't have a very human-like walk. Translating the walk so that the bear moved forward was a little difficult, because the walk is not very precise so it was hard to see how far to translate the model. When I finally went to cycle the clip for more than 33 frames, the entire animation broke and only the left leg would work. I have absolutely no clue how this happened. I tried making a new character set and remade the clip about 10 times but nothing seemed to fix it. All I could successfully render out was the first 33 frames. 

Monday, September 14, 2015

Character Model


The character that I've designed is based off of my childhood teddy bear, whose name is James Bond. My character is a secret agent bear who always wears sunglasses. I haven't modeled the sunglasses yet because they aren't essential to rigging the character. 


Wednesday, September 2, 2015

Volume 3 Project


Video

I'm not incredibly proud of this project, because I did it while I was really rushed and I was kind of frustrated with how it turned out. For some reason the turret doesn't actually move during its walk cycle, and I didn't know how to fix that. However, I did successfully use the trax editor to combine and blend animation clips, which was the point of the project.