This is the tentative version of our playblasted animation without any character meshes or surfaces. I did all of the camera animation. Most of it is pretty basic for now, but once we go in and smooth out the character motion I'll make the camera animation much better. Eileen, Tyler, and Noah did most of the character animation. While they were doing that, I was basically acting as the pipeline manager because I had to flesh out my naming conventions and referencing system. Neither of the characters have the meshes applied because we think something with the references broke. Also, the elbow rig on the guy is not working properly, so some of the animation that requires the guy to lean on his elbow does not look quite right. Tyler promised that he would fix that. Considering everything, I think we made pretty good progress on most of the primary animation. Once we apply the meshes and surfaces to everything, I think we'll be in good shape.
Friday, April 8, 2016
Playblasted 3D Animatic
This is the tentative version of our playblasted animation without any character meshes or surfaces. I did all of the camera animation. Most of it is pretty basic for now, but once we go in and smooth out the character motion I'll make the camera animation much better. Eileen, Tyler, and Noah did most of the character animation. While they were doing that, I was basically acting as the pipeline manager because I had to flesh out my naming conventions and referencing system. Neither of the characters have the meshes applied because we think something with the references broke. Also, the elbow rig on the guy is not working properly, so some of the animation that requires the guy to lean on his elbow does not look quite right. Tyler promised that he would fix that. Considering everything, I think we made pretty good progress on most of the primary animation. Once we apply the meshes and surfaces to everything, I think we'll be in good shape.

Wednesday, April 6, 2016
Update 4/6/16
This week I was supposed to start the camera animation. So far I've set up as many cameras as I can without working in the same scene as someone else. I'm really hesitant to start actually animating any camera motion because the actual character animations have not been done, and my camera animation sort of depends on that. Also, there seems to be some confusion on how many scene files in each environment need to exist and how to name those files. I tried to be as specific as possible when delineating how to name files and when describing which shots on the storyboard need to exist in the same file. Sometimes it's hard for me to get across to my team mates that I need these naming system to be exactly the way I described it or else the referencing will break and I won't know which scenes to animate my camera in. Really most of the work that I'm doing right now is just figuring out how I want the scenes and frames organized. I think I finally understand why being a pipeline manager is considered a whole job within itself. This stuff is ridiculously hard to coordinate within a team of five people.
Monday, March 21, 2016
Update 3/21/16
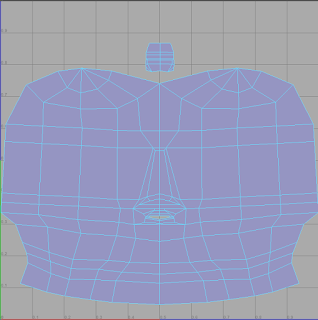
Today I started UV mapping the top part of our guy character. I started off with the head. The only parts of the face that were extruded out from the face were the nose and the mouth, so luckily it wasn't too hard to map. Tomorrow I'll probably have the hair UV mapped. Do I actually have to UV map the hair? I'll figure that out.

Models I Made
I realized I never posted final versions of the models I created for our animation. Here they are.
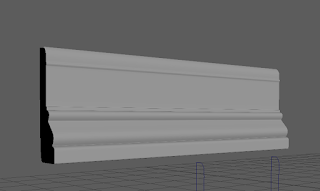



I made this crown molding using a CV curve that I traced over a crown molding profile. I then created a NURBS surface between two copies of the curve. Because of this, I can't UV map this piece of geometry because I would have to turn it into polygons and it looked absolutely heinous.

Fork

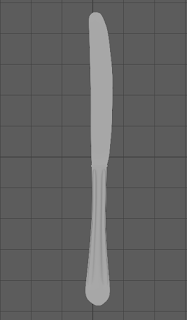
Knife

Picture Frame

Spoon

I know this table isn't the finest, but you never actually see the table legs or the tabletop in our animation. Basically we just needed to create a surface to drape the nCloth tablecloth over.

I made this wainscoting for the wall before I realized I could use CV curves. It's made out of actual polygons, which was probably an inefficient way to do it. I think it worked fine though.
Thursday, March 10, 2016
Update 3/10/2016
I was gone for the first two days of this week, but when I got back I kept UV mapping the guy character in our animation. I finished his hands, shoes, and am currently working on his torso.
Update:
Here are some snapshots of the work I currently have for the torso and shoe UV maps.


Update:
Here are some snapshots of the work I currently have for the torso and shoe UV maps.


Wednesday, March 2, 2016
Update 3/2/16
Today I began UV mapping the male character. I took about half the class to figure out how to delete an automatically mapped UV for the whole body and how to create and use UV sets. All of this was far more complicated than it should've been. I began mapping the hands, which I should be done with tomorrow. Finding a way to unsew a hand and stitch it back together strategically is actually kind of confusing, but I think my method should work.\
 This is hopefully the final version of the hand UVs. Here, one of the hands is reflected over the y axis because I was aligning them in order to make the UVs perfectly symmetrical. I put the seam around the palm of the hand, because it will probably be the least visible. I think this is a pretty okay first attempt at a hand UV, and I didn't really need a super complex one for the character in question.

Weekly Update
This is actually an update from the last week of February. We basically just finished modeling all of our assets for our short. I made all of the silverware, some wainscoting, crown molding, and a table.
Subscribe to:
Posts (Atom)